Mastering the Art of Soldering: How to Solder to PCB
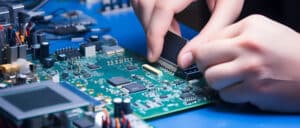
Soldering remains an integral skill in electronics fabrication and repair, yet soldering onto a Printed Circuit Board (PCB) can be tricky and require precision. Don’t worry though; this comprehensive guide will walk you through each step step-by-step!
1. How to Solder to PCB? Arranging Your Workspace
Before beginning, ensure you have a clean, well-lit workspace with adequate ventilation. Gather together necessary items including soldering irons, solder wire, cleaning sponges for sponge cleaning purposes, wire cutters and safety glasses; as well as the PCB with components to be soldered onto it.
2. How to Solder to PCB? Understanding Soldering Basics
Soldering to a PCB involves melting solder wire with an iron to form an electrical connection between components and printed circuit boards. Once soldered, these electrical connections must remain reliable so the solder is distributed onto both component leads and PCB pads at once for effective function.
3. How to Solder to PCB? Soldering Process
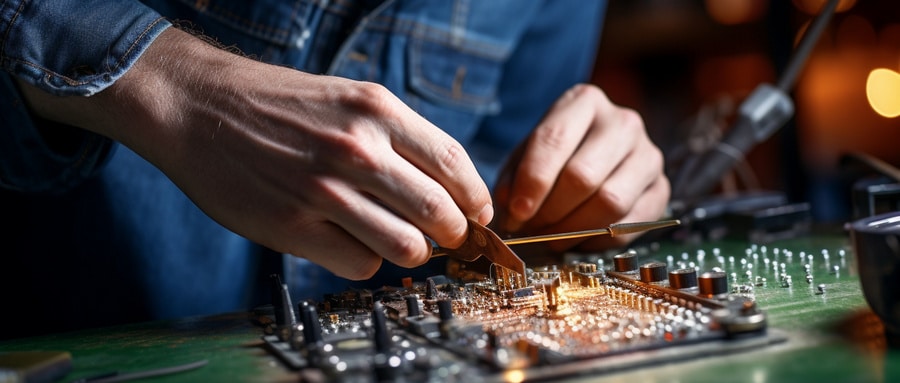
Prior to soldering, ensure all components are placed appropriately on the PCB and their leads inserted into designated holes. Heat the soldering iron to its appropriate temperature of 350-400 degrees Celsius and hold it on the junction between leads and PCB pads ensuring both are equally heated before feeding a small amount of solder into the joint and waiting for it to flow around them; remove this solder but leave your soldering iron in place for several seconds until solder has completely filled in all joints before carefully withdrawing it from use.
4. How to Solder to PCB? Cleaning and Inspecting of Joints
Once soldering has been completed, use an appropriate solvent to clear away any flux residue and inspect your joint. Solder should look shiny and keyed smoothly between leads and PCB. A dull or grainy finish could indicate cold joints which is poor electrical connections that requires additional rework.
5. How to Solder to PCB? Desoldering as an Efficient Way to Correct Mistakes
Mistakes happen, and knowing how to desolder can save your PCB from potential damage. For the easiest method of desoldering, heat the joint in question until molten solder begins escaping through it and quickly flick it away – or use desoldering braid or pump for this task.
6. How to Solder to PCB? Consider Safety
Finally, keep in mind that soldering irons can reach high temperatures, creating the risk of burns. Also beware that fumes from solder may be hazardous – always work in a well-ventilated area with ample ventilation or consider investing in a fume extractor to protect yourself from potential harm.
How to Solder to PCB? Conclusion:
Mastering the art of soldering requires time and practice. Make sure to take safety precautions seriously, focus on quality rather than speed, and always put safety first when soldering PCBs – quality solder joints can make all the difference when it comes to reliability and lifespan, so honing this skill should not be taken lightly! Happy Soldering!
FAQ:
- What is PCB soldering?
PCB soldering is the process of attaching two metal pieces together using a filler material, or solder. In the context of PCBs, soldering is used to establish an electrical connection between the board and the components placed on it. - What materials do I need for PCB soldering?
The basic tools required for PCB soldering include a soldering iron or station, solder (usually tin/lead alloy), a soldering sponge for cleaning the soldering iron tip, and tools for holding the PCB and the components in place. - What type of solder is best for PCBs?
The most common type of solder used in PCBs is a tin-lead alloy due to its lower melting point and good electrical conductivity. Lead-free solders are also becoming popular due to environmental concerns. - How do I clean the PCB before soldering?
Components and the PCB should be clean before soldering to ensure a good electrical connection. Using a brush with isopropyl alcohol (rubbing alcohol) is a common method. - What is the process of soldering a PCB?
After preparing the components and the PCB, place the component on the PCB. Hold the soldering iron in one hand and the solder wire in the other. Touch the soldering iron to the component leg and the copper pad at the same time, then touch the solder to the junction until it melts and flows around it. - What is reflow soldering and wave soldering?
Reflow soldering and wave soldering are industrial processes for soldering components to PCBs in large volumes. Reflow soldering involves applying a paste of solder and then heating the entire assembly till the solder melts. Wave soldering involves passing the PCB over a wave of molten solder in a specialized machine. - What are some good safety practices while soldering?
Always work in a well-ventilated area to avoid inhaling harmful fumes. Use safety glasses to protect your eyes. Avoid touching the tip of the soldering iron as it can cause severe burns. - What is desoldering and how is it done?
Desoldering involves removing solder from a joint, usually to replace or remove a component. It can be done using desoldering tools like desoldering pumps(solder suckers) or desoldering wire(braid). - Why is it important to clean the soldering iron tip?
It’s crucial to clean the soldering iron tip to prevent oxidation damage and maintain good heat transfer. It ensures that solder flows and adheres properly to components and pads. - What is the function of flux in soldering?
Flux is a chemical cleaning agent that facilitates the soldering process by removing oxidation from the metals to be soldered. It helps in improving the wetting characteristics of the liquid solder and thus in creating a strong bond.

