Mastering the Art of Soldering PCBs – Tips for Successful Assembly
Soldering is an integral step in the assembly of printed circuit boards (PCBs), as it creates electrical connections essential for electronic component functioning. Mastering soldering is key for creating reliable connections; in this article we’ll cover techniques and best practices for soldering PCBs – from tools and materials needed through to troubleshooting common soldering issues.
Tools and Materials:
- Soldering Iron: For precise soldering PCBs, choose a temperature-controlled soldering iron with an appropriate wattage. A fine-tipped soldering iron may also be more beneficial.
- Solder Wire: For maximum environmental and health considerations, lead-free solder is highly recommended as solder wire of this quality may cause lead poisoning issues.
- Flux: When soldering, apply flux liberally over areas needing soldering. Flux enhances solder flow and wetting of solder joints, creating reliable connections.
- 4. Solder Wick or Suction Device: These handy devices come in handy when it comes to clearing away excess solder or correcting soldering errors.
Proper Soldering PCB Techniques:
- Cleanliness: Before soldering pcb begins, ensure the PCB and components are thoroughly clean. Using isopropyl alcohol or PCB-specific cleaning solutions, use these to eliminate any dirt, oil or oxidation that might impede proper soldering.
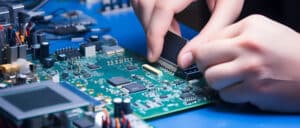
- Component Placement: Prior to soldering pcb, ensure that components are placed accurately onto a PCB by correctly aligning their leads or pads with any intended alignment locations in order to prevent misalignments during soldering pcb.
- Preheating: Preheating can assist with heat distribution during soldering pcb, alleviating thermal strain on components. For best results, utilize either a preheating plate or hot air rework station to maintain an even temperature throughout.
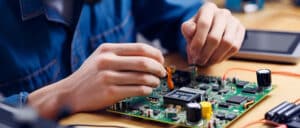
- Heat Application: Once heated to an appropriate temperature, use your soldering iron to apply heat directly onto both component leads and PCB pads simultaneously, so as to create an even and seamless solder joint. The amount of heat should be enough to melt solder and create a shiny joint finish.
- Adequate Solder Coverage: Make sure the solder covers both component leads and PCB pads sufficiently, creating a concave joint without gaps or solder bridges.
Soldering Solutions: Tips to Resolve Common Soldering Issues:
-
- Insufficient Solder: If there is not enough solder on the joint, heat the area and add additional solder to ensure proper coverage.
- Solder Bridges: Solder bridges occur when unintended solder joins adjacent pads or leads unknowingly, creating an undesirable “bridged point.” To remedy this problem, solder wick or suction devices should be used to remove excess solder from between these points.
- Cold Joints: Cold joints can be identified by their dull, grainy appearance and poor connection. To fix cold joints, heat them while applying flux and new solder to ensure adequate wetting and bonding of joints.
- Excessive Heat: Excessive heat can damage components or the PCB itself, so use your soldering iron with appropriate temperature setting for maximum productivity and work quickly to minimize exposure.
- Limit Pressure or Force When Soldering: Avoid applying too much force when soldering as this can damage components or cause misalignment issues.
Mastering the art of soldering PCBs is key for successful assembly and reliable connections. By adhering to proper soldering techniques, ensuring cleanliness, using quality tools and materials, and paying attention to component placement, professional-looking solder joints can be accomplished effortlessly. Regular practice and attention to detail will strengthen your soldering skills, creating sturdy connections on PCB projects with ease. Practicing regularly and paying close attention will enable you to become proficient at soldering – taking your PCB assembly skills one step further!
FAQ:
- What is PCB Soldering?
PCB Soldering is a process by which electronic components are attached to a Printed Circuit Board (PCB) using solder, a low-melting alloy that creates a strong, conductive bond. - What tools are needed for PCB Soldering?
The essential tools for PCB soldering include a soldering iron, solder wire, soldering flux, tweezers, and a workbench with a magnifying lamp. Optional tools can include desoldering pumps or wick, a soldering station, and various cleaning supplies. - What type of solder should I use for PCB Soldering?
The most common type of solder used for PCBs is a combination of tin and lead (Sn/Pb). However, for applications requiring lead-free soldering, tin-copper (Sn/Cu), tin-silver-copper (Sn/Ag/Cu), or other alloys might be used. - Are there safety precautions to consider while soldering PCBs?
Yes, soldering irons are hot and can cause burns, so handle with care. Additionally, fumes from soldering, especially when using flux, can be harmful if inhaled excessively. Use a fume extractor or work in a well-ventilated area. Always wear safety glasses when soldering. - What are the steps for Soldering PCB?
The basic steps for soldering a PCB include heating the soldering iron, applying a small amount of solder to the iron’s tip (known as tinning), placing the component on the PCB, heating the component lead and pad simultaneously, and applying solder to the lead and pad. - What is a good temperature for soldering PCB?
A good starting point is around 350 – 375 °C (around 650 – 700 °F). The exact temperature may depend on the type of solder, size of the pad, and other factors. - How do I perform soldering on a double-sided PCB?
Soldering a double-sided PCB is similar to a single-sided one, the primary difference being you will need to solder components on both sides of the board, making sure your components are tightly fixed before you flip the board to solder the other side. - What is the role of flux in soldering?
Flux cleans the metallic surfaces and enhances the flow of the solder, making it easier to form reliable solder joints. - What if I make a mistake when soldering? Can I undo it?
Yes, if you make a mistake while soldering, you can use a desoldering pump or desoldering wick to remove the solder and free the component. - Can I use a standard household iron for soldering PCBs?
No, a household iron will not work for soldering PCBs. A specific soldering iron is required to achieve the necessary temperature control required for effective soldering.

