Master the Art: How to Solder Wire to PCB
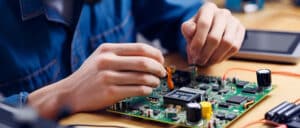
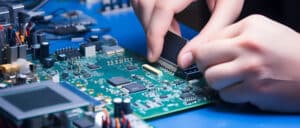
Soldering is a vital skill when working with electronic components. Soldering wires to printed circuit boards (PCBs) can be a difficult process, especially for beginners. With the right tools, safety precautions, and step by step guidance, anyone can learn this technique. This article provides a complete guide on how to solder wire to PCB.
Understanding Soldering Essentials
Soldering irons are hand tools used for soldering. Your choice of soldering tool and soldering cable will have a significant impact on the quality and effectiveness of your work. It’s important to use a heat-controlled soldering wire and a soldering tool with the right temperature.
Safety Measures
Safety comes first. Inhaling fumes and handling a hot metal iron can lead to injury or health problems. Wear safety glasses and work in an area that is well ventilated. Avoid touching the tip of the iron.
Step-By-Step Guide To Soldering Wire To PCB
How to Solder Wire to PCB? Step 1: Prepare
Gather all necessary equipment before you start soldering: a soldering wire, a wire cutter, and a PCB. Make sure all components are clean, including the wire and PCB. Surfaces that are dirty can make it difficult for the solder to adhere correctly.
How to Solder Wire to PCB? Step 2: Heat the Components
Position the tip of the soldering iron on the joint you wish to solder. It is important to heat the wire as well as the PCB at the same time to ensure that the solder flows smoothly over the surface.
How to Solder Wire to PCB? Step 3: Applying Solder
Do not touch the soldering wire directly to the iron. Instead, place the tip of the soldering wire on the joint that is heated. The heat will melt the solder and make it flow into the joint. This will form a solid connection between the wires and PCB.
How to Solder Wire to PCB? Step 4: Cool Down
Remove the soldering tool and let the joint cool down naturally. You should not blow on the joint as this can create a brittle one.
How to Solder Wire to PCB? Step 5: Inspection
After cooling, check your solder joint. The solder joint should be smooth and shiny, which indicates a good connection. If the joint appears spherical or dull, it is a cold connection and requires re-soldering.
The conclusion of the article is:
Soldering is an essential skill for anyone who works with PCBs. Understanding the basics and these steps will make soldering wires to PCBs a breeze. Let’s get your soldering tool ready and start connecting!
Written by PEAK Technology

References:
Pace Incorporated’s “Basic Soldering For Electronics Pace Handbook” is a guide to basic soldering for electronics.
Ulrich Tietze and Christoph Schenk, “Electronic Circuits Handbook for Design and Application”
This guide is an excellent place to start, but soldering requires practice. By following the steps correctly and observing safety precautions, the process will become second nature in due course. Enjoy soldering.
Soldering is a common method used to create and repair electronic devices. It is especially useful for creating and connecting PCBs (Printed Circuit Boards). PCB soldering has both pros and cons.
Advantages:
- Soldering creates durable connections. When soldered correctly, it helps to create mechanical combinations which are strong and durable. This facilitates a good electrical connector.
- Soldering can be very affordable, especially when mass production is being done in factories. Soldering irons and solder are inexpensive.
- Solder is a two-in-one product. It serves as both an electrical connector and a mechanical connection, fulfilling overlapping roles.
- Flexible: Soldering is flexible and allows for adjustments or reworks. This means that if an error occurs, it can be corrected without permanent damage.
Disadvantages:
- Soldering is a skill that requires technical knowledge and skill. If you do it incorrectly, you can cause poor electrical contacts or even damage to components due to excessive heat.
- Soldering is time-consuming. While it’s great for large scale production, smaller DIY projects, or customizing, soldering may take a lot of time.
- Stress-sensitive: Mechanical stress over time can cause joints to crack and break.
- Heat Damage to Components – Some components can be damaged by heat, not directly by the soldering iron but indirectly by conduction through the PCB or wires.
To minimize the risks, always wear protective clothing when soldering.

